It Not "Just Recess" Anymore!

Teachers often heave a sigh of relief when they take their students out to recess. Finally! The children can burn off the pent up energy they had been accruing for the past few hours indoors. But what if we change our outlook on outdoor play time? What if we create an outdoor environment that offered all of the learning opportunities that one would typically find indoors? What if children could run out to a well-planned play yard to find experiences in math, science, nature, dramatic play, water, building and construction, sensory activities, physical development, art and music? What if they play yard developed critical thinking, discovery, problem solving, and cooperative skills? The result would be that we wouldn't have "just recess" anymore. We would have The Outdoor Classroom!

Thursday, December 22, 2011

Snowball Targets! SNOOOOOW FUN!

We don't get snow in Southern California, and so if we want to have the experience of throwing snowballs, we have to make it ourself. We were a little concerned with letting the children go all out with an unbridled snowball fight, so with a bit of prep, we created the most exciting dramatic play thus far - SNOWBALL TARGET PRACTICE!


With the help of some coworkers, we strung several lines of string from the school wall to our patio overhang. I then hung targets from the strings. I varied the heights and the depths of the string for added challenge. We draped a sheet at the back to catch the flying snowballs and prevent them from smashing into the Art and Language table. A flat wall would work, too, but I was pretty sure that my director would not have appreciated the thump, thump, thump of careening "snowballs" hitting her office window!


To create a defined space, we laid tires along the edge of the space. We put chairs behind the chairs to create a viewing and waiting area. Of course, we provided winter wear such as scarves, mittens and fluffy hats to get into the winter mood!


We provided a large crate filled with "snowballs" (see below) and allowed 2 children at a time to stand on the bales of hay and launch their snowballs at the targets. We allowed each set to empty the crate. The children all cheered for each other when someone hit a target and all of the children helped in the cleanup each time the crate was emptied.


The enthusiasm for this activity was so high and all of the children (and many of the parents!) wanted a turn. I even saw a few teachers practicing their aim with the targets. We did have one teacher stationed at the center to keep everyone in a "festive" mood and to regulate the queue.

The snowballs are Ziplock bags filled with packing peanuts. I used strong clear packing tape to seal each bag into the shape of a ball. The targets are simply laminated construction paper. We had a snowman die-cut, so I added the snowmen for extra appeal and told the children that the goal was to hit the snowman.


This is by far one of the most exciting events we have set up on the yard (there are many exciting things that arise on the yard, but this one was intentional). It was a hit with the children, parents and teachers! The snowballs could also be used for a controlled snowball toss, or even a {monitored} snowball fight.

And so, WINTER has officially arrived in SoCal! Yippee!

Happy Holidays everyone!


Tuesday, December 20, 2011

Holiday Boughs with Puffy "Snow" Paint

We are always looking to incorporate nature or natural elements into our art or activities at the school. This week, I brought in the bottom branches that I had cut from my Christmas tree. I snipped them into small segments, tied some ribbon to the top, and had the children paint them with Shaving Cream Puffy Paint (see recipe below or click the link to find other fun activities with this recipe). They also shook on some gold glitter and Christmas sequins.


The result was a set of stunning holiday boughs. I just wish we had done these at the beginning of December!


RECIPE: Shaving Cream Puffy (Snow) Paint: 1 part white school glue, to 4 parts shaving cream. Mix well. The final product dries puffy and white!


Monday, December 19, 2011

Christmas for our "Wild" Friends


Thanks to my coworker's quick camera, we caught our little friend enjoying "his" snack!


Like most schools, we LOVE Christmas! After all the harvest decor (click to see how we decorated for Fall!) has been removed from our Outdoor Classroom, we bring in the Christmas trees.


This year, we chose to decorate one of the trees with child-made decorations ...


and the other tree we hung strings of yummies for our wild friends who visit the yard.


We have several birds and two resident squirrels who visit. We have several birds and two resident squirrels who come to visit on a regular basis. They seem to know when nap time comes and they pop in to see what kind of feast we have prepared for them. In the Fall, they feasted on our pumpkins. They gnawed HUGE holes in them! They munch on our garden, eat the corn off the decorative cobs, and now they have found our Christmas Tree delights.

At school, we strung toasted O's and fruity O's cereal.


They were a hit! As you can see, this little guy got tired of eating the treats one by one and finally nabbed the whole string!


At home, my boys and I made bird seed cookies. We also strung cranberries and popcorn to hang on the trees outside. Though we enjoyed making them, the birds didn't find this particular recipe overly appealing. But, visit this link at NurtureStore to find some fabulous ideas for having a "Wild" Christmas! 


Monday, December 12, 2011

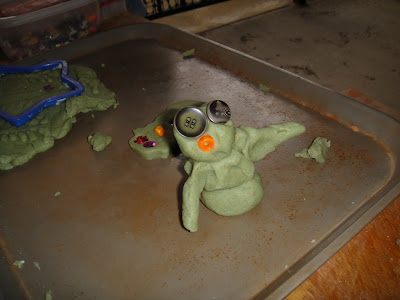
Perfect Playdough Recipe for Outdoor Use

We use playdough in the Outdoor Classroom a lot. There are always several children at the station and it is enjoyed by all the ages we serve.


Since the dough sits outside ALL morning (from 7:00am until past noon), we need a super soft and long lasting playdough.


To be honest, I thought all playdough recipes were 'created equal', but after several disastrous 

"Googled" recipe attempts, I finally asked the teachers at my school which recipe they use. 


Here is the one they recommend and we use it VERY successfully outdoors. It will last over a week or so under the outdoor conditions mentioned above and it will last for several weeks in the classroom!

5 cups flour
5 cups water
3 tablespoons cream of tartar
1 cup salt
1/2 cup oil
Add food coloring, spices, or extracts as desired to enhance color and smell. You can also add glitter, fairy dust, or other mediums such as sand to add texture.

Mix all ingredients in a large pot. Heat on medium, stirring until a soft dough forms. Remove from heat and let cool.


Sunday, December 11, 2011

A Forest in the Sandbox

Our creative younger pod added a festive forest to their little sandbox on their patio.


They supplied mini trees, real tree branches, pine cones, plastic forest animals and tree cookies. Tree cookies are just the chopped ends from Christmas trees...available NOW for FREE anywhere Christmas trees are sold!!


We love them so much that we ask our parents to gather the cookies when they get their trees at Christmas. My coworker does a lot of exploration with tree cookies in the project room. For more ideas, visit her blog at I Work 4 Kids!


Thursday, December 8, 2011

Outdoor Nativity - Dramatic Play

In the spirit of the season, we joyfully hauled out all of the nativity-style clothes we could muster for the children to explore in our new Nativity dramatic play area. We supplied wings for the angels, sheer fabric, gowns for Mary and cloaks for Joseph, headbands for the shepherds, fancy hats and gifts for the wise men, blankets, stuffed animals, and of course, Jesus and the manger (a doll and cradle). We had two bales of hay to define the area. Sounds great, but in fact, it looked...well....pathetic. 


Truly, it looked like two bales of hay and a crate of clothes. 

So, what to do for our sad looking corner? Bring on the butcher paper and erect a stable!!! For the final touch, we just added a HUGE glittery star that hangs from the ceiling! Cue the Christmas music, and HARK, we have an inviting dramatic play that is fit for the season!


Wednesday, December 7, 2011

Christmas Sensory Bin

I have been envying several very cute and well-put together mini-sensory bins across the blogosphere lately, so I finally decided to make one of my own. I went to the 99 Cent Store and stocked up on a few Christmas items - plastic candy canes, a batch of erasers, mini ornaments, bells, glittery snowflakes, Christmas themed kaleidoscopes, and more. I also threw in some pompoms and set all the goodies on top of rice. Several of the children investigated each item in the bin. Two little girls lined up all of the items on the edge of the table. When I asked what they were doing, they replied, "setting up the presents!"

This Christmas bin is what I would call a "small world" or mini-sensory bin. For some PHENOMENAL large-scale bins, visit Tom at Sand and Water Tables. He takes sensory bins to entirely new level of engaging!!!!


Tuesday, December 6, 2011

Swirly, Sparkly Water Play

We bought a few packets of water beads to test out in the Outdoor Classroom sensory bin. They were WONDERFUL! Unfortunately, we didn't buy nearly enough, so our supply was short-lived. With the remaining few that I had left, I created a Swirly, Sparkly Water Table.
 I added water, water beads, Christmas confetti and glitter to a small water table. I also added some empty water bottles. 

The water was cold, so the children rushed over to our large water table and snatched the large slotted spoons and tongs for picking up the beads. 


Filling the bottles took a lot of fine motor coordination and patience. The children astounded me with their concentration as they tried hard to fill their bottle with as many beads as possible.


Once the bottles were full and caps were tightened, the children discovered that they could swirl the water so it looked like a colorful tornado! They also realized that when you look at someone through water beads, the other person is upside down! How does that happen, anyway???


Monday, December 5, 2011

Please Vote!

I am thrilled to be on the shortlist for Best New Blog! What an honor!!!


The nominations for the 2011 Edublog Awards have been finalized and the voting is now open. You can vote once per day until Dec. 13th. 

It is wonderful to see such an abundance of Early Childhood Ed blogs in the mix. Specifically, I am drawn to those sites who promote outdoor learning because this is such a critical issue in today's world. Children are spending more time than ever inside and research shows that it is negatively affecting their health and wellbeing. Please help me raise awareness for the benefits of outdoor learning by voting for blogs that include ample activities that encourage outdoor play in the early years and beyond!

Here are a few top picks for early years blogs that promote play, learning, and exploration of the outdoors. 


Click on each link to go directly to the voting pages on Edublog:


Best New Blog (Shameless plug for myself, I know!): Exploring the Outdoor Classroom by Kristin


Best Group Blog: Play Based Learning

Best Individual Blog: Jennifer Kable - Let The Children Play

Best Teacher Blog: Teacher Tom


Thanks for voting...and remember to vote daily for your favorites!


Saturday, December 3, 2011

Puffy Snow Paint

Prior to the major storm this week, our sensory/art project on the patio was Puffy Snow Paint (see recipe below). I mixed up a batch (it looked a LOT like Cool Whip), provided spoons for scooping, and offered the children the opportunity to make a snowy picture. I also added small jars of glitter to add some glitz to the project. This group is fairly active, and so I imagined a full sensory experience of using hands and fingers to spread the soft "paint" around. Funny enough, there was only one little girl who dove into the gooey mix with full gusto!


The boys diligently scooped and patted the paint with their spoons, ever so careful not to get any on their hands! One boy did give it a little taste, but discovered quite quickly that it doesn't taste nearly as good as it looks! 


The glitter was a HUGE hit with the boys and they did shake those little bottles with enthusiasm!


I don't think they started with an idea in mind, but they all decided that their pictures looked very much like mountains and volcanoes. And they did!


I hung their pictures up on our display line on Wednesday. That night, a massive storm (click to read that post) hit our city and cluttered our yard with over 30 garbage bags of debris! Our 3 sided easel was ruined, the patio was a MESS, trees were toppled outside the gates, and our "loose parts" were found everywhere around the yard. Lamp posts and traffic lights were snapped in half, but those little pictures were still hanging on the line the next day! Sparkly volcanoes and mountains survived! ;-)


RECIPE:
Mix 1 part school glue to 4 parts shaving cream. 
*Dries exactly as it is put on the paper! Looks fluffy, feels soft and dry.