Sensory IS Science is a recipe book of sensory and science activities designed for preschool and early elementary students. Most of the photos are taken directly at our center, but some are borrowed from the blogosphere. If any of these are your photos, please let me know so I can give credit! This book was part of a seminar I offered with a coworker at the ACSI convention in Anaheim entitled "En-Gross-ing Sensory and Science." I hope you enjoy it! PS - it is still a work in progress, so any comments or suggestions are welcome!
If you would like to print it, or if you can't see the book, please click on the link and it will redirect you to scribd where you will be able to download it.
Recipes for Learning - Sensory Book
Thursday, November 15, 2012
Long Time No See!
It is hard to believe that I haven't posted since summer! My excuse? Hmmmm. Well, life I guess! During the summer, my family and I went on vacation for a few weeks and moved into a house. If that wasn't busy enough, I accepted the position as director of the preschool where I work. This was a VERY exciting time, but of course, very hectic. And so, my blog fell behind. It is my hope to get it back up and running. But, now that I am the director, I don't have quite the hands on development of the outdoor curriculum that I did last year. Thankfully, one of our fabulous teachers filled that role and she has taken our Outdoor Classroom to an entirely new level. That said, I now feel compelled to treat everyone as equals, so I will be posting ideas from across the center and from everyone's classrooms. I may even take a few INDOOR photos, LOL.

So, I hope you will come to see me here and there! I am speaking at the ACSI convention in Anaheim, CA next week, so my next post will be resources that I created form my seminar: "En-GROSS-in Sensory and Science Activities for Young Children."


-Kristin

So, I hope you will come to see me here and there! I am speaking at the ACSI convention in Anaheim, CA next week, so my next post will be resources that I created form my seminar: "En-GROSS-in Sensory and Science Activities for Young Children."


-Kristin
Saturday, July 14, 2012
Ice, Ice, Baby!

To change it up a bit, we decided to add several bins of ice each morning. We squirted a few drops of liquid water color (purchased from Discount School Supply) and the children went to work.

We were only planning to set out this activity for a week or so because of the sheer quantity of ice we needed to bring in, but the children enjoyed it so much that we wound up hauling ice for nearly a month!


Wednesday, May 16, 2012
Science Lab!
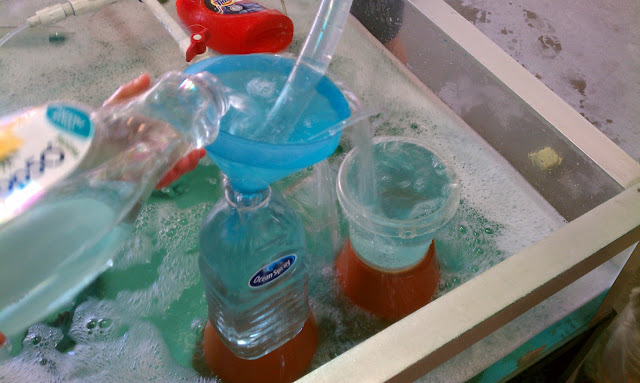
As the weather heats up, we LOVE to add water play to the Outdoor Classroom. This week, we created a science lab in the dramatic play center. In one area we had crushed ice with spoons and applesauce cups. On the back table we added blocks of ice with small hammers and golf tees for pounding. In the front bins, we used three different colors of water. Just add goggles, lab coats, beakers, funnels, test tubes and basters for serious scientific discovery!


 |
| Colored water, frozen in latex gloves. |
Wednesday, April 4, 2012
Barrel Pumps in the Outdoor Classroom
We recently added this beautiful barrel pump to our Outdoor Classroom. It was a simple addition, yet it has added a wealth of engagement in our OC. Our garden has been an integral part of our yard, however, we have always needed a staff member present to fill our little ones' watering cans with the hose. This old-fashioned barrel pump was the perfect solution. Not only do the children flock to the pump to fill their canisters for watering their class gardens, but the pump offers unique lessons on water flow, cause and effect, and the new gross motor movement of pumping the handle up and down. In fact, our three year olds were so intrigued with the pumping action, they didn't even venture into filling containers until after a few days!

The pump was built by one of our handy parents. We simply purchased a large wine barrel and an "old fashioned pitcher pump" at our local hardware store. Click HERE to find the model we used. The entire system cost approximately $70! Our handy parent then caulked the barrel, installed the metal platform, and then bolted on the pump.

Simple and SIMPLY WONDERFUL!
Wednesday, March 21, 2012
Pay It Forward...Gifts to Give!
INDICATE IN THE COMMENT BOX BELOW IF YOU WOULD LIKE TO ENTER THE DRAW FOR TO RECEIVE THE NEXT PAY IT FORWARD GIFT!
I simply love the concept of Pay It Forward. In any arena of life, giving something to someone else is always good sentiment. I was thrilled when I received the news from Kierna at Learning for Life that I was the winner of one of the Pay It Forward packages! What fun...a package from Ireland!
I received the package about 2 weeks before the American St. Patrick's Day holiday. In it was a little stuffy leprechaun, a fantastic book, a beautiful calendar, some Irish flower seeds, and some information about their country. Of course, I held on to it until the festivities began...I mean, what could be better than receiving a package with a leprechaun in it while celebrating St. Patty's Day and wearing hand-made hats adorned with Shamrocks?!?!
Since I don't have a classroom of my own, I asked my son's kindergarten teacher to do the honors of sharing the package with her class. I have to say, she was MORE than creative! Prior to opening the gift with the students, she removed the leprechaun and hid him in the classroom. She rearranged several elements of the classroom such as turning the tooth chart upside down, rearranging the calendar numbers, changing the name tags around, and more. She told the children that when she opened the package in the morning, a mischievous little leprechaun had jumped out an disheveled the classroom. She told the children that he hid in the classroom and they would have to look for him and signs of his mischievous acts throughout the day! The kids were COMPLETELY hooked and enjoyed the idea that a little leprechaun was in their class. At nap time, the children found the little leprechaun hiding in their blankets! What a treat...a leprechaun straight from Ireland! Thanks Kierna!
 |
My son and his kindergarten class - adorned in shamrock hats and holding their new leprechaun friend!
(sorry for the blurred faces...it is school policy)
|
Now it’s my turn to Pay It Forward.
So if you would like to play AND are willing to pay it forward from your own blog, then here is what you do.
Leave a comment on this post stating that you want to play, and I will randomly choose three players.
You can be from anywhere in the world!!
The rules are:
• To the three participants I will send a fun package representing sunny California in the United States, but you must be willing to Pay it Forward to three more people.
• Comments will remain open until April 21st 2012.
• If you are chosen you will need to send me your postal address so that I know where to send your parcel.
• After you receive the package you will need to Pay it Forward in the same manner on your blog.
Thursday, March 15, 2012
Train Station Dramatic Play
As a Reggio-inspired school, we try to incorporate child-initiated, project-based learning (similar to emergent themes) throughout the curriculum and school environment.
As a curriculum coordinator at the school, I try to integrate projects that are taking place in each classroom into the shared-by-all areas of the patio, yard and atelier (project/art studio).

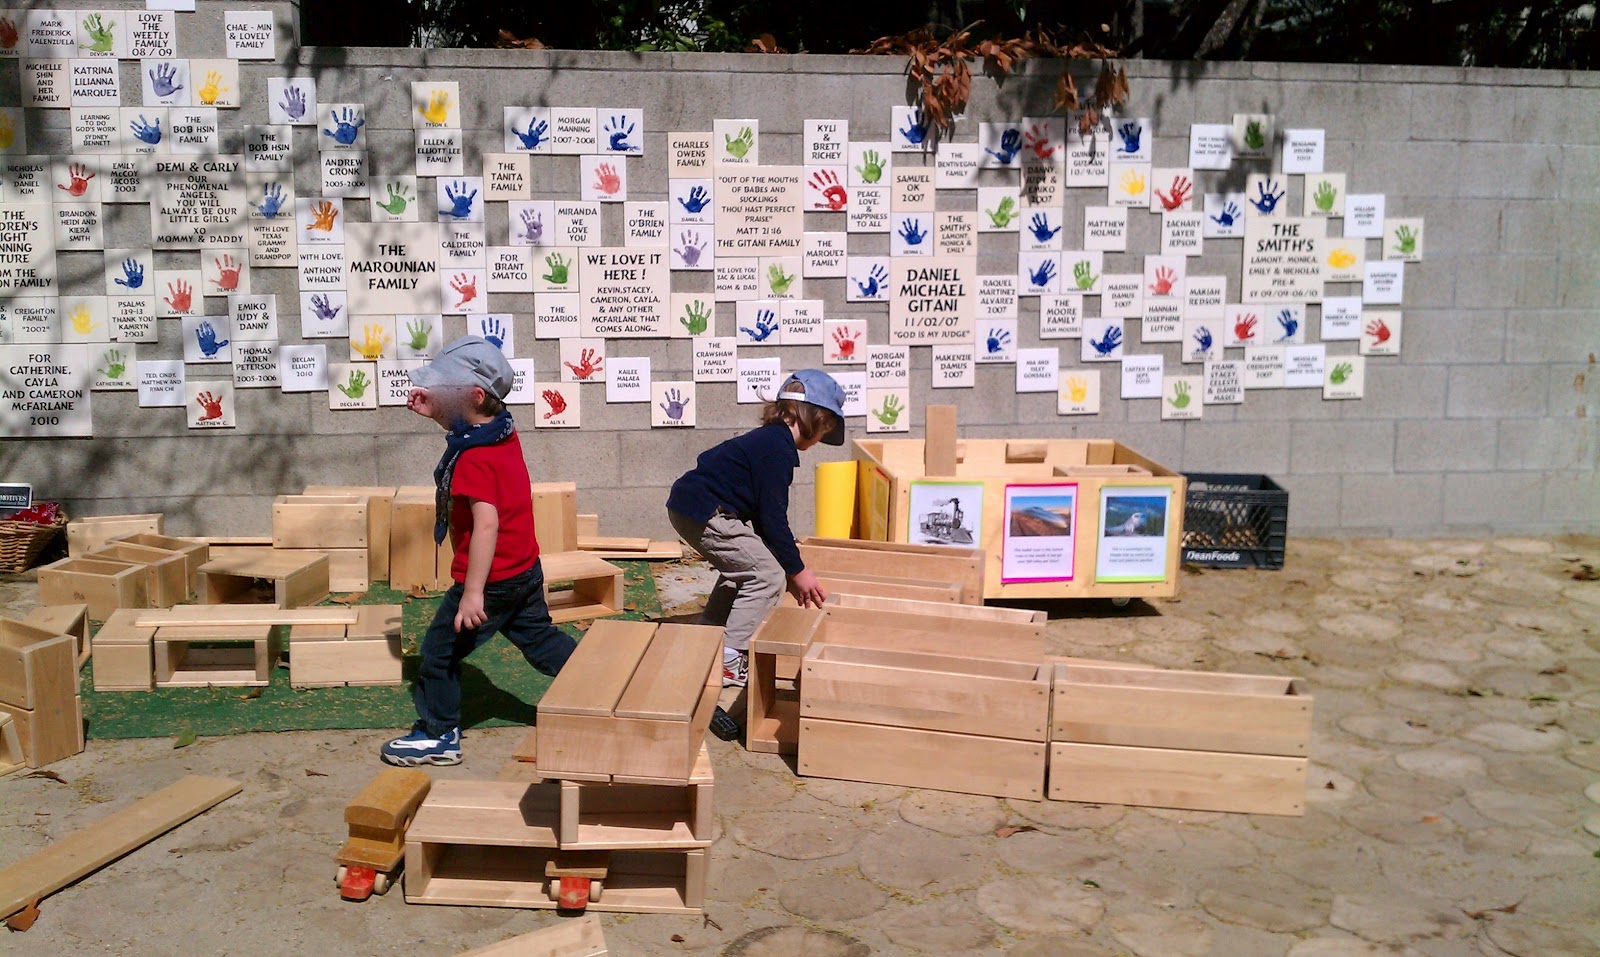
Currently, our 3 year olds are studying about trains. Last week, we added a train component to our hollow block center on the yard (see above). In a large wicker basket, we set out engineer hats, scarves, and large wooden trains. We also set up a basket of paper, coloring pencils, and books to inspire sketching, drawing and reading about trains (below). Many children designed great trains using the large hollow blocks.

To extend the project, this week we painted a large 'bullet train' in the Project Room. We also learned to sketch trains in our Exploring Art class, added trains and tracks to the free-choice patio environment, and we transformed our dramatic play area into a train station! Enjoyed by all, these activities were specifically aimed at our three year olds to extend and enhance their project. Not to be left out, each of our other classes enjoyed an array of activities that were geared specifically to their ongoing projects and interests!
 |
| Painting the bullet train. Furnace boxes are perfect!! |
 |
| Wagons were set out for train rides and shared motor activities |

 |
| Our 'bullet train' made in the atelier. Duct taped for durability ;-) |
 |
| In addition to a set of pre-printed 'train tickets,' we set out paper and coloring pencils for the children to create their own tickets. |
 |
| We posted a map of our local Metro on the front of the ticket booth. |
 |
| Tickets, please! |
Incorporating projects into shared spaces not only stimulates learning for the intended class, but enhances the environment and sparks new interests for all the other students in the school.
Wednesday, March 14, 2012
The Environment as a Teacher: Gutters & Water
We recently added some new loose parts to the Outdoor Classroom: GUTTERS! I set up the gutters on the yard as shown, but we gave no specific instruction on how to use them.


Our Pre-K students noticed the gutters right away and began pouring the water down the gutters and into a bucket.

As the water spilled over and flowed into the hole, the students realized they could make a river. With enthusiasm, they grabbed small shovels from the crates and requested our "real" tool shovel so they could make trenches and rivers in the sandbox.


They worked cooperatively for approximately 30 minutes with barely a word from the teachers. As the children dug their trenches, connecting several holes that had been built by multiple children, and as they watched water flow through the sandbox, I took a moment to reflect on the capability of children to create knowledge from their environment. In the 30 minutes they spent on this project, they learned about force, flow of water, angles, absorption, and so much more. Could we possibly have taught them all of that in circle time? I think not.

The well designed environment IS a remarkable teacher in and of itself. Don't you think?
Wednesday, February 29, 2012
See, Move, Build, Sketch
I recently attended a conference on The Outdoor Classroom Project here in California. I always love going to seminars because there is always something useful that we can take away from the experience. My "take-away" piece of knowledge this time was the "See, Move, Build, Sketch" model to teaching preschoolers. I especially love this approach because it can work effectively in teaching nearly any topic.

Though it is fairly self-explanatory, here is the idea in a nutshell. In italics, I have provided our specific plans for implementing this teaching/learning model in the hollow block center of our outdoor classroom. I will use the subject of trains to help illustrate the points since our three-year olds are currently working on trains as a long-term project.
SEE - Show children photos, cards, books and models of the subject you are teaching or of the idea you are hoping to 'inspire'.
Our plan: Hang photos of various trains such as steam locomotives, cargo trains and bullet trains, near the hollow blocks center in the Outdoor Classroom; show photos of engineers, & conductors; set out fiction and non-fiction books about trains; supply a set of large, wooden toy trains for the children to explore with the blocks.
MOVE - BE the subject.
Our plan: Supply engineer hats for the children to wear in the center; line-up chairs near the blocks so the children can pretend they are passengers on a train; encourage children to chug around the yard as if they were trains going on a trip; practice train sounds.
BUILD - Build models of the subject at hand using blocks, play dough, clay, recyclables, or any other appropriate medium.
Our plan: Encourage the children to build trains using the hollow blocks - they could make large-scale trains for multiple children to sit in, small trains using just a few blocks, a train to encompass the chairs, or they could even build tracks for the wooden trains that have been placed in the center.
SKETCH - Encourage the children to draw, sketch, diagram, or illustrate pictures of the subject on hand. Encourage the children to make sketches of the creations they built using the various mediums.
Our plan: Supply clipboards, paper, and pencils for the children to draw and illustrate their hollow block creations; encourage the children to sketch about trains they have see or sketch their own ideas for new trains they would like to design. Hang sketches in the center for other children to see.
Here are some very simple photos of how this teaching/learning model has been used in the outdoor classroom at the Child Education Center in La Canada, California (the founding center of "The Outdoor Classroom Project").


Thursday, February 23, 2012
Sensory Bin with a Hole-y Top

First, let me apologize for the very extended break I took from my blog. I am ashamed! Although, I do have an excuse...
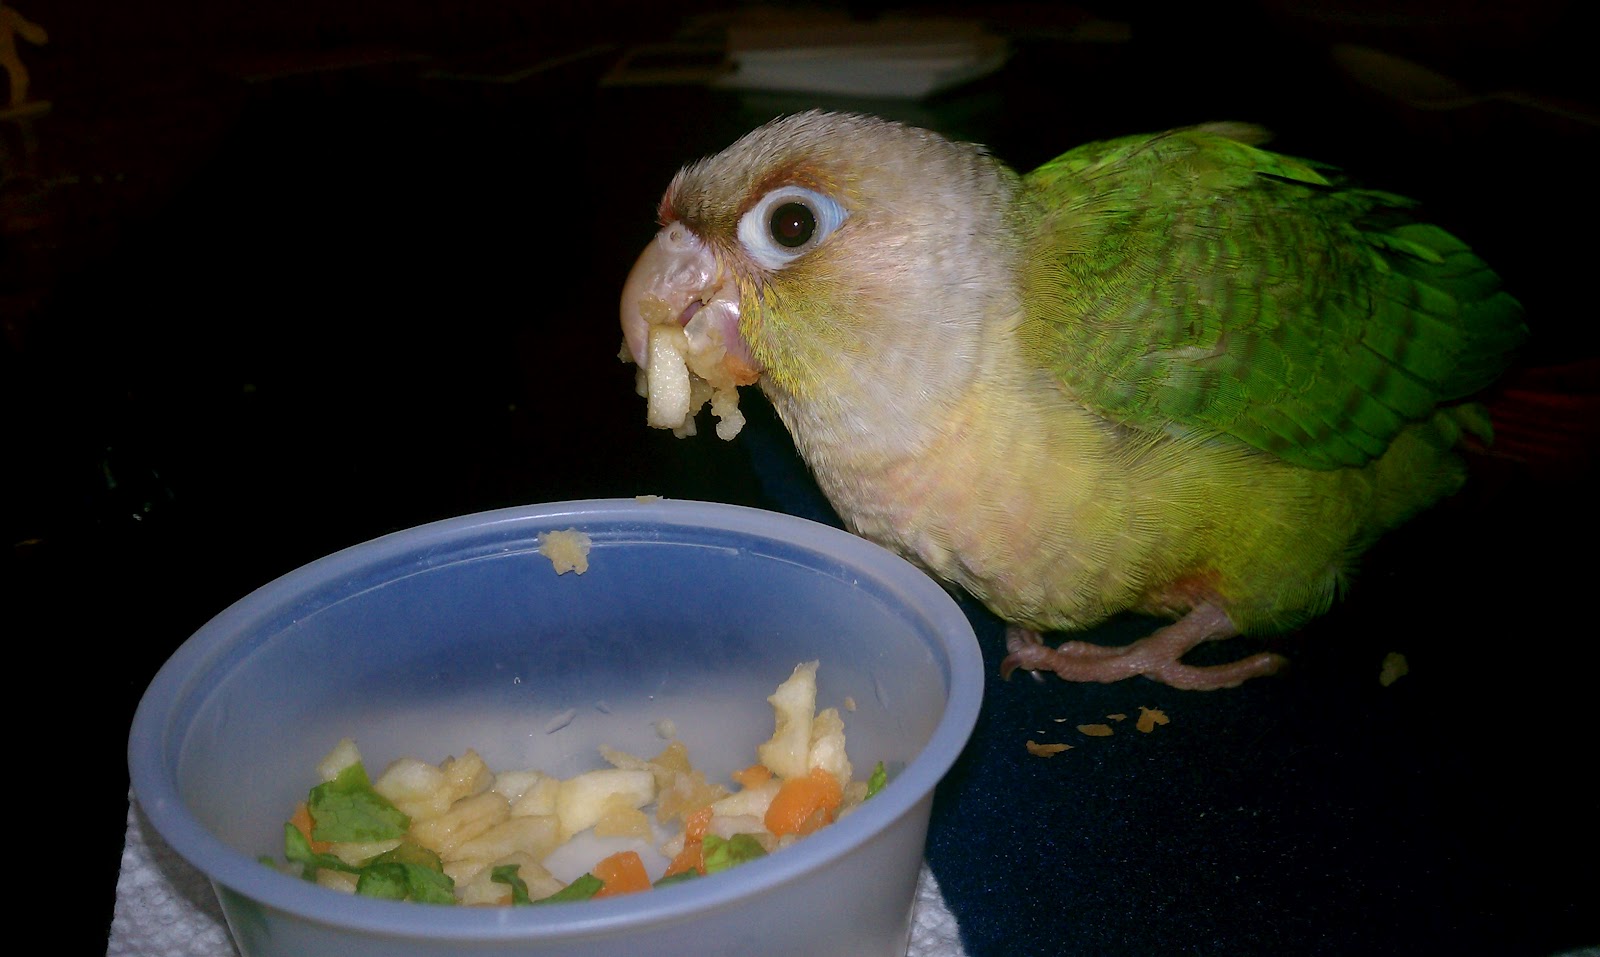
Meet my new Cinnamon Conure :-). We bought him nearly weaned, so we were rather preoccupied with feeding, snuggling, and admiring our new little creature! His name is Candy Apple. Isn't he cute???


BUT, back to business! Once again, I have 'borrowed' one of Tom's sensory bin ideas from his blog at Sand and Water Tables. He has a great explanation as to why this apparatus is valuable for learning and he even shows a few videos of the children in action. I am working towards getting a wooden table-top, but in the meantime, I rigged up this cardboard top to see if the wooden top would be a good investment. After watching the children scoop, dig, pour, balance, and maneuver their scooping tools, I have no doubt that that the investment would be well worth it!

This was truly one of those activities that engaged the children for LONG periods of time. Today, two boys worked steadily at the station for over half an hour!

This table top was very easy to make. I laid down three sheets of cardboard, measured and cut them to the size of the sensory table, and then sealed the edges with red duct tape. I used a box cutter to cut through each layer of the cardboard. Then, I taped along the edges of the holes. I scored the tape so it would go around the circles without crumpling up. For stability, I taped the table-top to the sensory bin.

Reaching into the table through the holes was a new experience and caused the children to think about how they were going to pull the beans and corn out without spilling.


As with any sensory activity, there is always some clean up. These boys enjoyed using the brooms as much as they enjoyed using the new table top!
Thursday, January 26, 2012
Building DOWN with PVC
We have been working with PVC pipes for some time now. The kids always enjoy them and they have made some very creative structures with the shorter sections of pipe (6-24 inches). This week I brought out the 24 - 36 inch pipes. At the beginning, the children were excited that they could connect 2 pipes together and touch the roof. I, on the other hand, wasn't quite as excited about that option since the pieces were liable to disconnect and fall on a head (okay...DID fall on a head!). My clever coworker decided to work with the children's desire for height by hanging the pipes from the existing rope that was strung from our patio overhang.
The experience for building DOWN rather than UP was intriguing to the kids. It took effort not to yank the hanging pieces while pushing in new pipes. The structures became all sorts of things and their creativity expanded as they had to think on a whole new plane. This was such as success, that my coworker and I are now trying to think of other items that could be built down, around or sideways! We have thought of lego boards on a easel, Zoobs hanging from ropes, but what else? Any ideas??
Here are some of the experiences we had with the PVC:
 |
| The finished "product" - Even Mopsy the bunny came to check it out! |

 |
| Hard hats are recommended! |

 |
| Much discussion took place as the children worked their way through the new building 'arrangement.' |
 |
| The structure grew so large that extensions were laid flat on the ground. |

Subscribe to:
Posts (Atom)