It Not "Just Recess" Anymore!

Teachers often heave a sigh of relief when they take their students out to recess. Finally! The children can burn off the pent up energy they had been accruing for the past few hours indoors. But what if we change our outlook on outdoor play time? What if we create an outdoor environment that offered all of the learning opportunities that one would typically find indoors? What if children could run out to a well-planned play yard to find experiences in math, science, nature, dramatic play, water, building and construction, sensory activities, physical development, art and music? What if they play yard developed critical thinking, discovery, problem solving, and cooperative skills? The result would be that we wouldn't have "just recess" anymore. We would have The Outdoor Classroom!
Showing posts with label Art. Show all posts

Thursday, January 12, 2012

Arctic Animal Excavations, Gak, a Pots and Pans Band, and More!

The holidays have past and the children are back into full swing at school. So, it is time to keep up with the post-holiday energy by adding some great new activities to the Outdoor Classroom.

Arctic Animal Excavation (Science, Sensory, Fine Motor) -


In the spirit of winter, we provided an "Arctic Animal Excavation" station. I placed a few arctic animals in 3 separate bowls and put them in the freezer overnight.


Each morning, I popped out the frozen animals and placed them in the sensory bins. I then added a few new animals to the bowls, refilled with water, and set them into the freezer for the next day.


Armed with goggles (this is a must due to flying ice!), child-sized hammers, and golf tees "nails", the children excavated the animals from their ice bergs.


The older children really took a fancy to this activity and they pounded the ice with great gusto (hence the goggles!). Once the animals were excavated, the ice melted throughout the morning and made a nice arctic animal mini-world play area.


Since I haven't blogged in oh-so-long, here are a few other things going on this week.

Gak -
This is a super sensory experience as Gak is very similar to the gooey slime that you can purchase in stores. I used 1 part white school glue to 1 part liquid starch. I also added a touch of liquid water color.


Simply mix with a spoon (or your hands!) until the mixture is combined. Mine started out a bit like stringy spaghetti, but after sitting for a bit, it all came together perfectly.


By the way, do you know that you can blow bubbles by sticking the end of a straw into the Gak??? Fun!


For a translucent effect, use clear glue and liquid water color. This mixture has a slightly softer texture. For those of you with a bit of potty humor, put the mix in a cup and squish it down...oh the sounds it does make! ;-) heehee!

Home-made Drum Band-
This was a super-simple, but oh-so-pleasing activity for the kids. The music area in our playground sits within 100 feet of one of our upper elementary buildings, so we are always cautious not to make too much noise. However, while the elementary students were on break, we take advantage of our right to make some noise!


And what better noise than a Pots N' Pans band? We set out pots, pans, oatmeal containers, buckets, wooden spoons and drums sticks.


The students, and even a few enthusiastic teachers, had a great time making "music."


 A few girls put the materials to another use...they were making "soup" instead of music :-).


Snowy Easel -
Another super-easy, but oh-so-pleasing sensory activity...shaving cream on the easel!


Colored Tape Art-
Several weeks ago, the children worked with black electrical tape to create works of art inspired by Piet  Mondrian. This week, I stumbled upon this TERRIFIC colored tape dispenser filled with rolls of colored masking tape. I set out paper and the tape and the children created art filled with unique lines and designs.


Tuesday, December 20, 2011

Holiday Boughs with Puffy "Snow" Paint

We are always looking to incorporate nature or natural elements into our art or activities at the school. This week, I brought in the bottom branches that I had cut from my Christmas tree. I snipped them into small segments, tied some ribbon to the top, and had the children paint them with Shaving Cream Puffy Paint (see recipe below or click the link to find other fun activities with this recipe). They also shook on some gold glitter and Christmas sequins.


The result was a set of stunning holiday boughs. I just wish we had done these at the beginning of December!


RECIPE: Shaving Cream Puffy (Snow) Paint: 1 part white school glue, to 4 parts shaving cream. Mix well. The final product dries puffy and white!


Saturday, December 3, 2011

Puffy Snow Paint

Prior to the major storm this week, our sensory/art project on the patio was Puffy Snow Paint (see recipe below). I mixed up a batch (it looked a LOT like Cool Whip), provided spoons for scooping, and offered the children the opportunity to make a snowy picture. I also added small jars of glitter to add some glitz to the project. This group is fairly active, and so I imagined a full sensory experience of using hands and fingers to spread the soft "paint" around. Funny enough, there was only one little girl who dove into the gooey mix with full gusto!


The boys diligently scooped and patted the paint with their spoons, ever so careful not to get any on their hands! One boy did give it a little taste, but discovered quite quickly that it doesn't taste nearly as good as it looks! 


The glitter was a HUGE hit with the boys and they did shake those little bottles with enthusiasm!


I don't think they started with an idea in mind, but they all decided that their pictures looked very much like mountains and volcanoes. And they did!


I hung their pictures up on our display line on Wednesday. That night, a massive storm (click to read that post) hit our city and cluttered our yard with over 30 garbage bags of debris! Our 3 sided easel was ruined, the patio was a MESS, trees were toppled outside the gates, and our "loose parts" were found everywhere around the yard. Lamp posts and traffic lights were snapped in half, but those little pictures were still hanging on the line the next day! Sparkly volcanoes and mountains survived! ;-)


RECIPE:
Mix 1 part school glue to 4 parts shaving cream. 
*Dries exactly as it is put on the paper! Looks fluffy, feels soft and dry.

Saturday, October 15, 2011

A Few Storage Tips and Tricks


I really enjoyed Jenny's blog (Let the Children Play) this week about creative ways to store loose parts in the Outdoor Classroom. I wanted to piggy back on her post because I LOVE to learn about creative ways to organize the environment. 

There were so many great ideas on her post. She was kind enough to feature my idea about using milk crates for outdoor storage (to get directly to the post, click here). Milk crates are a wonderful "loose part" in themselves, but they are also a terrific way to store shovels, buckets, natural items, pvc pipes, mud kitchen materials, and more. They can be hosed down, the sand falls through, and they can be easily labeled. We have several classrooms ages 2 - 5 who use the same playground, so labeling is essential for us.  Each class in our school is asked to "reset" the Outdoor Classroom (ie - clean it up!) before the next class comes out to enjoy the yard. 


Another great storage trick we have is our 3 bin sensory/water tables. These tables were custom made and hold 3 removable utility bins. They are very simple and wouldn't take much to recreate. When we are using playdough, we put cafeteria trays over the bins to create a flat and elevated surface on which to roll and mould the dough. We store the tools in the middle bin. When it is time to clean up, we pop the playdough in a bag, and everything goes under the trays. 


Take note and look UNDER this table...the tires and tarp are for overnight storage. We lay the tarp on the table and hold it down with tires. The tires are also used as "loose parts" in our Outdoor Classroom.


When we are playing with water, goop, ooblek, etc., we take off the trays and put it straight in the bins. 


This table is EXTREMELY versatile!


Our outdoor "Quiet Corner" is an old bathtub! We've stacked blankets inside so the children don't have to sit too low into the tub and lined the top with pillows to make it extra soft. The books are stored in a simple woven basket. This is a covered area, so we do not do anything to protect it overnight or on weekends.

Use baggies to keep make clean-up a breeze!

I have worked in education for years and have always dreaded cleaning up the paint jars. When I started my role at this preschool, I was so impressed to see their idea for creative cleanup...line the jars with ziplock bags! Not overly environmental, but we do keep the same liners for a week since they don't tend to dry out. We store the jars in a caddy in the shed overnight. We wash the brushes and tops as needed.

Our 2's teacher used cafeteria trays and lined the tables with towels for their cornstarch and water sensory experience (click here for the ooblek recipe and the science behind it; and if you haven't tried it, you MUST!!!!). It was a neat change from the traditional method of using a bin. She provided colored water in recycled applesauce containers, spoons, and cups of cornstarch for the children to explore. 


When our 3's teacher was planting flowers in pots, she lined the ground with a tarp and put the dirt in utility bins (we have as many of these bins as we do milk crates!!!). She provided child sized gardening tools and she let the children do the potting. When the project was complete, we rolled up the tarp and dumped the contents over our raised garden beds. 


Since we received WAY too many Pansies this season, I had each child plant a Pansy in a cup to take home. I used the same tarp and bin method, but we sat at a table since we were on the patio.


This is one of our "diorama" tables. They were also custom made by the same person who made our other sensory boxes. Again, these tables would be VERY simple to build. To make this sensory box, we lined the table with a tarp (for easier cleanup), and then poured in cornmeal, rice and beans.


This is the same table in use during our "dino dig." To the left, you can see our other diorama table which we used for the "science lab" area.  
We also use these tables for Duplo, Lego, tree blocks, doll houses...you name it!

Tarps and tires cover pretty much everything that needs to be protected at night. In the morning, set up is quick and easy as I just have to fold the tarps and toss the tires to the side. Remember, tires are a fantastic loose part, so they are part of the children's play environment.

I hope you found these tips useful. Please feel free to add your own clever ideas!


Thursday, October 13, 2011

PVC = Science and Art!

When I was asked to take over the "patio" responsibility at our school, I had to think for a long time about what angle I was going to take with the activities. The patio is designed for the 3 - 5 year olds and is our version of "indoor/outdoor" flow for an hour during their free choice time. Though I work with the teachers on specific activities to strengthen particular skills, the rest is for me to "take it and run."


I envisioned a beautiful art area filled with ample resources such as recyclables, jars of paint, and oodles of colored paper. I thought about it, but then it occurred to me that our "Project Room" serves that exact purpose (click here to visit the I Work 4 Kids blog, written by our Project Room teacher).
Well, I could do dramatic play, puzzles, and fine motor. Nope...that is already IN the classroom! It finally struck me that large science, gross motor, messy art, water play, nature-oriented and sensory activities were just what we needed for the children who would be "naturally inclined" to choose the outdoor space for their free time activities.


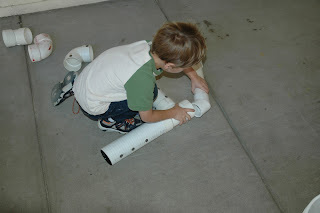
This week, one of the focus activities was PVC tubes and balls. I had the children explore various sizes of PVC tubes with varying sizes of balls (golf, whiffle, and marbles). Of course, my idea was to roll the balls into the pool, but that lasted for about...oh...30 seconds!


Soon, ramps, tubes and slides were being built across the patio and balls were running wild. The tubes were hooked onto the patio fence, window sills and the 5 gallon paint bucket that I was using to store the PVC. However, the kids were focused and intention and they were creating unique and effective ramps designed to jump balls into cups, race marbles with friends, and test out force and velocity. Did I worry that my intended method wasn't in use? NOPE! The children had taken their learning much further than my idea would have allowed. And that should be a teacher's goal...to allow children to create their own thoughts, processes, and understandings.


Today, I removed several pieces of the pipe and left only a few select balls. I lined the pool with paper, squirted in ample amounts of paint, and let them discover how the paint reacted to the different balls.


One boy realized that the lighter balls would get stuck in the paint, while the heavier ones would roll through to make the longest tracks.


I didn't put too many limits on how to use the pipes or shovels (which were technically added for the purpose of scooping up balls in case the children didn't want to get their hands dirty...lol!). The shovels became "hockey" sticks for the balls and were also used to shmear the paint. One little girl even picked up a clean sheet of paper and laid it across her favorite "ball painting" to make a mirror image.


Tomorrow, we will use 3/4" PVC with marbles and paint!


The other activities I set out were: a "construction zone" with gutters, blocks, and lego vehicles;


  clay;


tree blocks with forest animals;


painting and printing on leaves from our playground;


and a sensory bin filled with beans, magnet wands and small magnetic items (click the links to see detailed posts on these activities).

If you don't have a patio, then I would highly recommend bringing any of these activities into the yard. Remember...anything you can do inside, can be done BIGGER AND BETTER outside!!!