It Not "Just Recess" Anymore!

Teachers often heave a sigh of relief when they take their students out to recess. Finally! The children can burn off the pent up energy they had been accruing for the past few hours indoors. But what if we change our outlook on outdoor play time? What if we create an outdoor environment that offered all of the learning opportunities that one would typically find indoors? What if children could run out to a well-planned play yard to find experiences in math, science, nature, dramatic play, water, building and construction, sensory activities, physical development, art and music? What if they play yard developed critical thinking, discovery, problem solving, and cooperative skills? The result would be that we wouldn't have "just recess" anymore. We would have The Outdoor Classroom!
Showing posts with label Science. Show all posts

Saturday, July 14, 2012

Ice, Ice, Baby!

 A while back, we set up a "science lab" in the outdoor classroom. Various shades of colored water filled bins upon bins in our dramatic play area. The children donned goggles and lab coats and set to work mixing the brilliant colors in beakers, funnels, measures, cups, basters, and more. 


To change it up a bit, we decided to add several bins of ice each morning. We squirted a few drops of liquid water color (purchased from Discount School Supply) and the children went to work. 


We were only planning to set out this activity for a week or so because of the sheer quantity of ice we needed to bring in, but the children enjoyed it so much that we wound up hauling ice for nearly a month! 


Wednesday, April 4, 2012

Barrel Pumps in the Outdoor Classroom

We recently added this beautiful barrel pump to our Outdoor Classroom. It was a simple addition, yet it has added a wealth of engagement in our OC. Our garden has been an integral part of our yard, however, we have always needed a staff member present to fill our little ones' watering cans with the hose. This old-fashioned barrel pump was the perfect solution. Not only do the children flock to the pump to fill their canisters for watering their class gardens, but the pump offers unique lessons on water flow, cause and effect, and the new gross motor movement of pumping the handle up and down. In fact, our three year olds were so intrigued with the pumping action, they didn't even venture into filling containers until after a few days!

The pump was built by one of our handy parents. We simply purchased a large wine barrel and an "old fashioned pitcher pump" at our local hardware store. Click HERE to find the model we used. The entire system cost approximately $70! Our handy parent then caulked the barrel, installed the metal platform, and then bolted on the pump.


Simple and SIMPLY WONDERFUL!

Wednesday, March 14, 2012

The Environment as a Teacher: Gutters & Water

We recently added some new loose parts to the Outdoor Classroom: GUTTERS! I set up the gutters on the yard as shown, but we gave no specific instruction on how to use them. 


Our Pre-K students noticed the gutters right away and began pouring the water down the gutters and into a bucket. 

As the water spilled over and flowed into the hole, the students realized they could make a river. With enthusiasm, they grabbed small shovels from the crates and requested our "real" tool shovel so they could make trenches and rivers in the sandbox. 


They worked cooperatively for approximately 30 minutes with barely a word from the teachers. As the children dug their trenches, connecting several holes that had been built by multiple children, and as they watched water flow through the sandbox, I took a moment to reflect on the capability of children to create knowledge from their environment. In the 30 minutes they spent on this project, they learned about force, flow of water, angles, absorption, and so much more. Could we possibly have taught them all of that in circle time? I think not.


The well designed environment IS a remarkable teacher in and of itself. Don't you think?


Thursday, February 23, 2012

Sensory Bin with a Hole-y Top


First, let me apologize for the very extended break I took from my blog. I am ashamed! Although, I do have an excuse...

Meet my new Cinnamon Conure :-). We bought him nearly weaned, so we were rather preoccupied with feeding, snuggling, and admiring our new little creature! His name is Candy Apple. Isn't he cute???


BUT, back to business! Once again, I have 'borrowed' one of Tom's sensory bin ideas from his blog at Sand and Water Tables. He has a great explanation as to why this apparatus is valuable for learning and he even shows a few videos of the children in action. I am working towards getting a wooden table-top, but in the meantime, I rigged up this cardboard top to see if the wooden top would be a good investment. After watching the children scoop, dig, pour, balance, and maneuver their scooping tools, I have no doubt that that the investment would be well worth it!


This was truly one of those activities that engaged the children for LONG periods of time. Today, two boys worked steadily at the station for over half an hour! 


This table top was very easy to make. I laid down three sheets of cardboard, measured and cut them to the size of the sensory table, and then sealed the edges with red duct tape. I used a box cutter to cut through each layer of the cardboard. Then, I taped along the edges of the holes. I scored the tape so it would go around the circles without crumpling up. For stability, I taped the table-top to the sensory bin.


Reaching into the table through the holes was a new experience and caused the children to think about how they were going to pull the beans and corn out without spilling.


As with any sensory activity, there is always some clean up. These boys enjoyed using the brooms as much as they enjoyed using the new table top!

Thursday, January 26, 2012

Building DOWN with PVC

We have been working with PVC pipes for some time now. The kids always enjoy them and they have made some very creative structures with the shorter sections of pipe (6-24 inches). This week I brought out the 24 - 36 inch pipes. At the beginning, the children were excited that they could connect 2 pipes together and touch the roof. I, on the other hand, wasn't quite as excited about that option since the pieces were liable to disconnect and fall on a head (okay...DID fall on a head!). My clever coworker decided to work with the children's desire for height by hanging the pipes from the existing rope that was strung from our patio overhang.

The experience for building DOWN rather than UP was intriguing to the kids. It took effort not to yank the hanging pieces while pushing in new pipes. The structures became all sorts of things and their creativity expanded as they had to think on a whole new plane. This was such as success, that my coworker and I are now trying to think of other items that could be built down, around or sideways! We have thought of lego boards on a easel, Zoobs hanging from ropes, but what else? Any ideas??

Here are some of the experiences we had with the PVC:

The finished "product" - Even Mopsy the bunny came to check it out!


Hard hats are recommended!


Much discussion took place as the children worked their way through the new building 'arrangement.'

The structure grew so large that extensions were laid flat on the ground.


Thursday, January 19, 2012

Swamp Sensory Bin

I have been eyeing Tom's "Swamp" sensory event at Sand & Water Tables for some time. If you haven't visited Tom's site, it is well worth a look-see. His sensory tables are phenomenal!

I finally put in the effort to create a similar table on our patio area. I used a 3 separate sensory/water tables for this project to add depth, dimension and varying levels. I added swamp creatures, sand, leaves, and various other natural items to the bins. I also used bamboo garden poles for the bugs to "crawl" on. Each day, I add water to the swamp for added sensory fun. It is a bit of a mess, so the event will probably move to the yard next week, but it has drawn a lot of attention thus far!

Here is what I came up with...


Catching creatures in bug containers filled with swamp water.

Thursday, January 12, 2012

Arctic Animal Excavations, Gak, a Pots and Pans Band, and More!

The holidays have past and the children are back into full swing at school. So, it is time to keep up with the post-holiday energy by adding some great new activities to the Outdoor Classroom.

Arctic Animal Excavation (Science, Sensory, Fine Motor) -


In the spirit of winter, we provided an "Arctic Animal Excavation" station. I placed a few arctic animals in 3 separate bowls and put them in the freezer overnight.


Each morning, I popped out the frozen animals and placed them in the sensory bins. I then added a few new animals to the bowls, refilled with water, and set them into the freezer for the next day.


Armed with goggles (this is a must due to flying ice!), child-sized hammers, and golf tees "nails", the children excavated the animals from their ice bergs.


The older children really took a fancy to this activity and they pounded the ice with great gusto (hence the goggles!). Once the animals were excavated, the ice melted throughout the morning and made a nice arctic animal mini-world play area.


Since I haven't blogged in oh-so-long, here are a few other things going on this week.

Gak -
This is a super sensory experience as Gak is very similar to the gooey slime that you can purchase in stores. I used 1 part white school glue to 1 part liquid starch. I also added a touch of liquid water color.


Simply mix with a spoon (or your hands!) until the mixture is combined. Mine started out a bit like stringy spaghetti, but after sitting for a bit, it all came together perfectly.


By the way, do you know that you can blow bubbles by sticking the end of a straw into the Gak??? Fun!


For a translucent effect, use clear glue and liquid water color. This mixture has a slightly softer texture. For those of you with a bit of potty humor, put the mix in a cup and squish it down...oh the sounds it does make! ;-) heehee!

Home-made Drum Band-
This was a super-simple, but oh-so-pleasing activity for the kids. The music area in our playground sits within 100 feet of one of our upper elementary buildings, so we are always cautious not to make too much noise. However, while the elementary students were on break, we take advantage of our right to make some noise!


And what better noise than a Pots N' Pans band? We set out pots, pans, oatmeal containers, buckets, wooden spoons and drums sticks.


The students, and even a few enthusiastic teachers, had a great time making "music."


 A few girls put the materials to another use...they were making "soup" instead of music :-).


Snowy Easel -
Another super-easy, but oh-so-pleasing sensory activity...shaving cream on the easel!
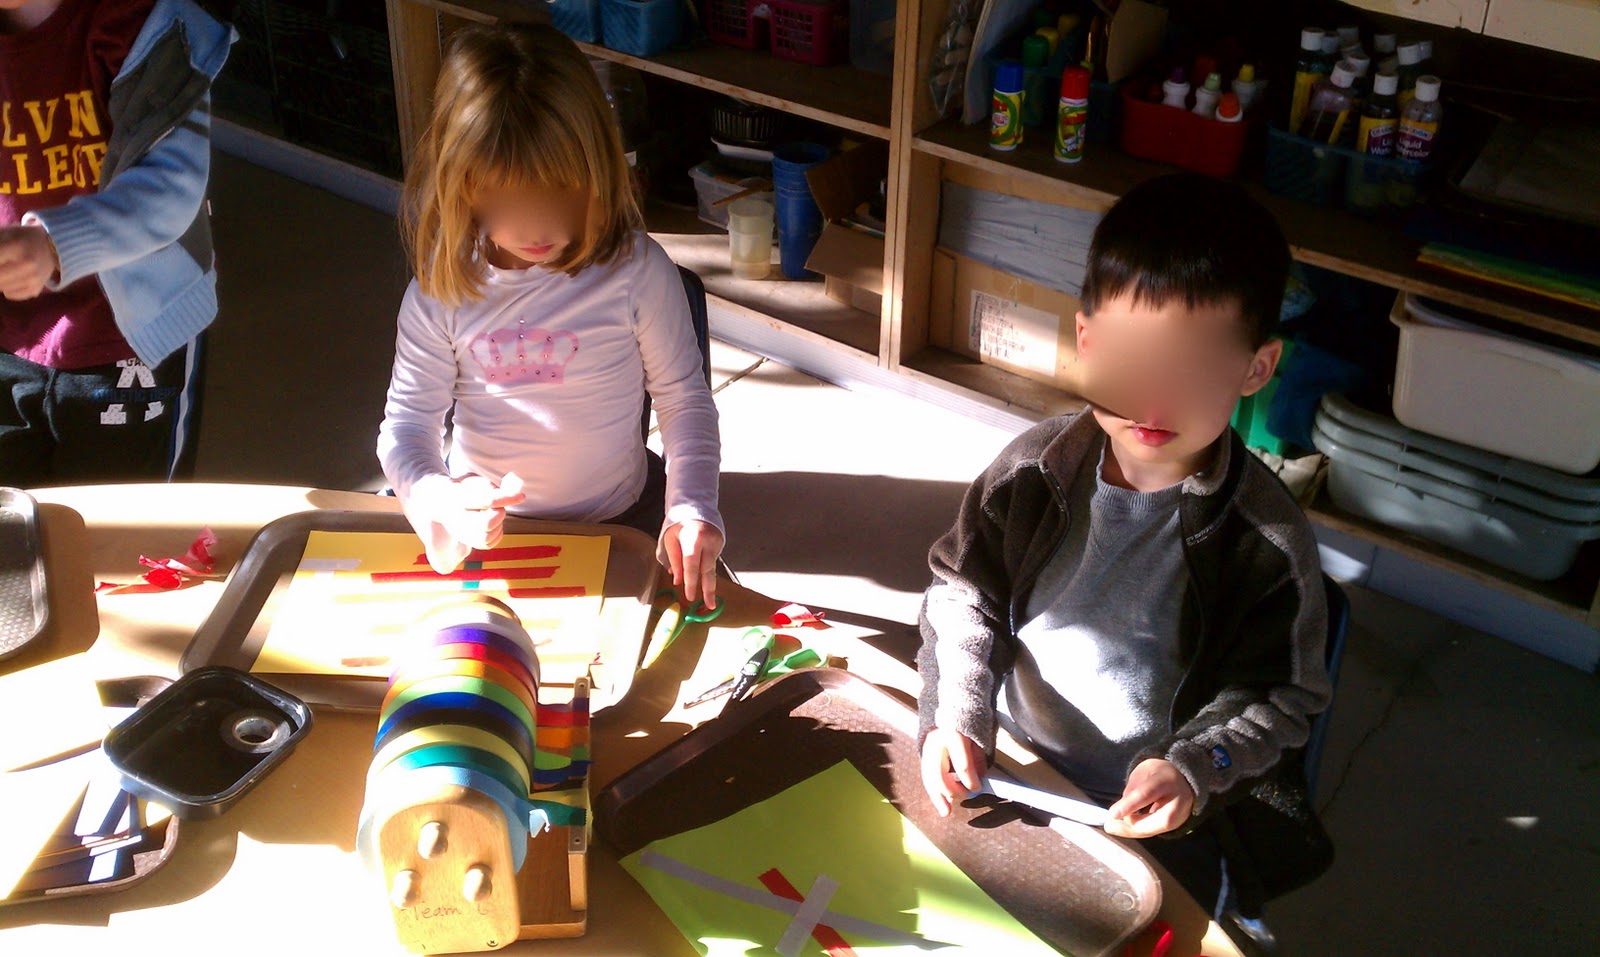


Colored Tape Art-
Several weeks ago, the children worked with black electrical tape to create works of art inspired by Piet  Mondrian. This week, I stumbled upon this TERRIFIC colored tape dispenser filled with rolls of colored masking tape. I set out paper and the tape and the children created art filled with unique lines and designs.